Doofinder’s main ‘Settings’ are located under the Setup section of the admin panel.
In the Settings section, you will find the following sub-sections:
- General
- Security
- Facets
- Search Fields
- Custom Sorting
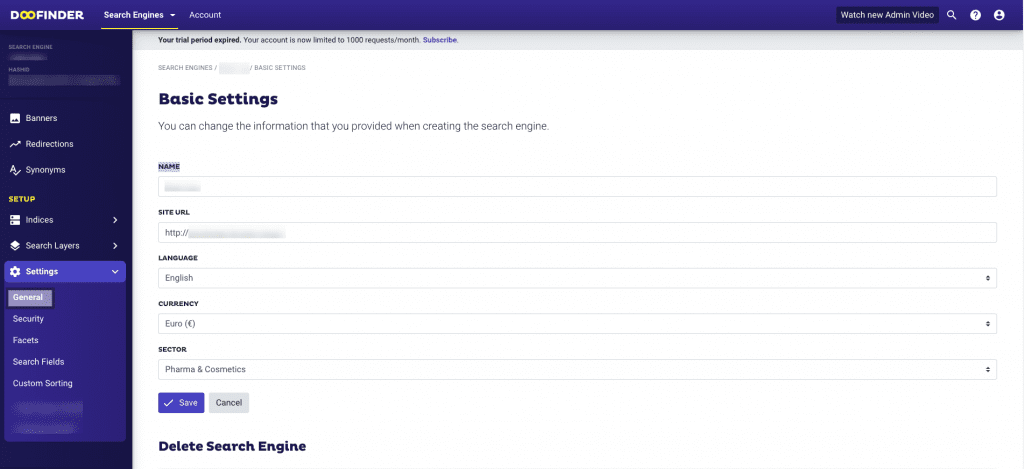
General
As indicated in this section, you can change the initial information you provided when creating the search engine. You can also Delete the search engine, albeit you must read the warning before hitting the ‘Delete Search Engine’ button.
Security
Doofinder uses Cross-Origin Resource Sharing (CORS) to prevent unauthorised domains from using your search engines. Thus only whitelisted domains can perform client-side requests to your search engines.
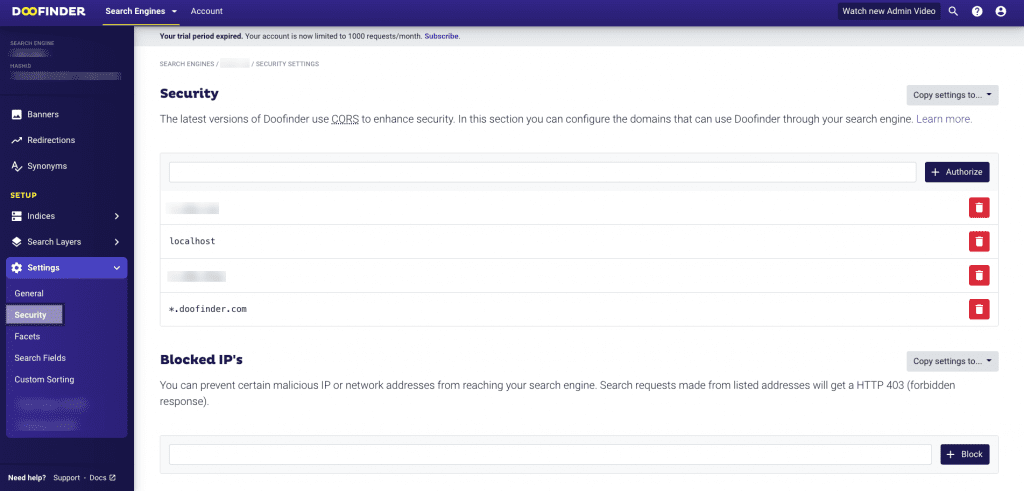
Doofinder enables your main domain by default and *.doofinder.com too, so you can use the search from the admin panel.
Say you own a search engine for an e-commerce website accessible at http://www.mysafeshop.com. You will probably see how *.mysafeshop.com is whitelisted inside Allowed Domains in the Security screen. If you want your users to search in http://www.mysafeshop.com from another site, for instance, https://www.myfriendsshop.com, you will have to authorise that domain by adding a new entry to Allowed Domains. Just enter http://www.myfriendsshop.com and save.
How the Pattern Works
Websites use domain names, and domain names have subdomains: http://www.doofinder.com is a subdomain of http://doofinder.com.
To prevent big lists of authorized domains, you can use patterns with wildcards to match, for instance, any subdomain of a domain.
Say you also have a blog accessible at http://blog.mysafeshop.com. You can grant access to your search engine from both www and blog using a wildcard: *.mysafeshop.com.
If you have inner subdomains, you can repeat the pattern: *.*.mysafeshop.com.
If you use your search layer in different pages with multiple inner subdomains, you can match all of them with the double-asterisk wildcard (**) like in **.mysafeshop.com.
Blocked IPs
This section allows you to specify IPs or entire IP ranges (using network notation) to forbid access to your Search Engine explicitly.
This is useful to prevent Bot attacks from public IPs. It will also allow you to easily stop any puntual attack from a specific IP if it ever happens.
Remember to review blocked IPs frequently because IPs on the Internet change, so you may be blocking a valid IP after some time.
Facets
The Facets feature allows you to filter the ‘Search’ by certain fields. If you make a facet visible, it will be displayed in the search results here.
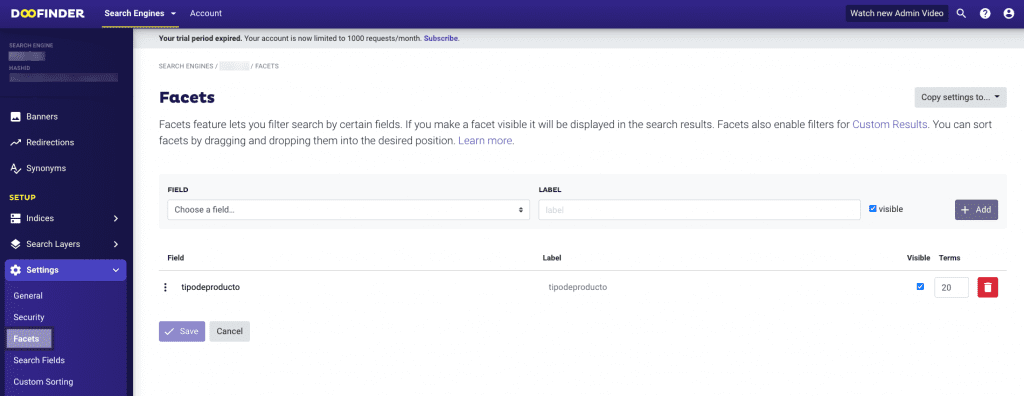
See The Product Data Feed for further configuration of the Faceted Search.
Search Fields
Before making any changes here, understand that any change will affect how the search engine will respond to the queries made by the user on your website, altering the way our products are displayed, so you must choose the fields and the weight of each field carefully.
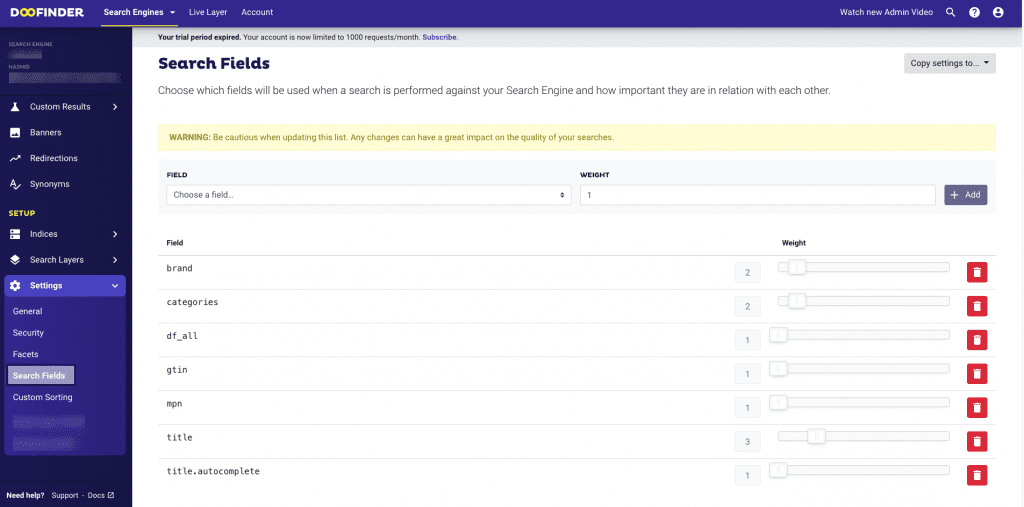
Click on the dropdown menu under the ‘Field’ section to select the field you want to add and give weight in relation to other fields, on a range from 1 to 10.
In addition to the most frequently used categories(i.e., brand, colour, material and price), other fields include:
- df_all: here, in the search, we include the content contained within all the fields of the data feed, enabling the rest of the fields that have not specifically been selected to be searched as well. Note that this field is not optimised in any special way, so we strongly recommend that you assign it a low weighting.
- gtin.light.explode and mpn.light.explode: These are specific fields for a reference search. These allow the search engine to use parts of the reference number of a product to perform searches. Depending on the source of your data feed, you have to use one or the other.
- title.autocomplete: this field is specifically designed to do searches based on parts of the title.
📌 Note: Each time you create a new field, remember to click the Save button to make sure the changes are saved.
Custom Sorting
📌 Note: Custom Sorting and Custom Results refer to two different things on the Doofinder Admin panel.
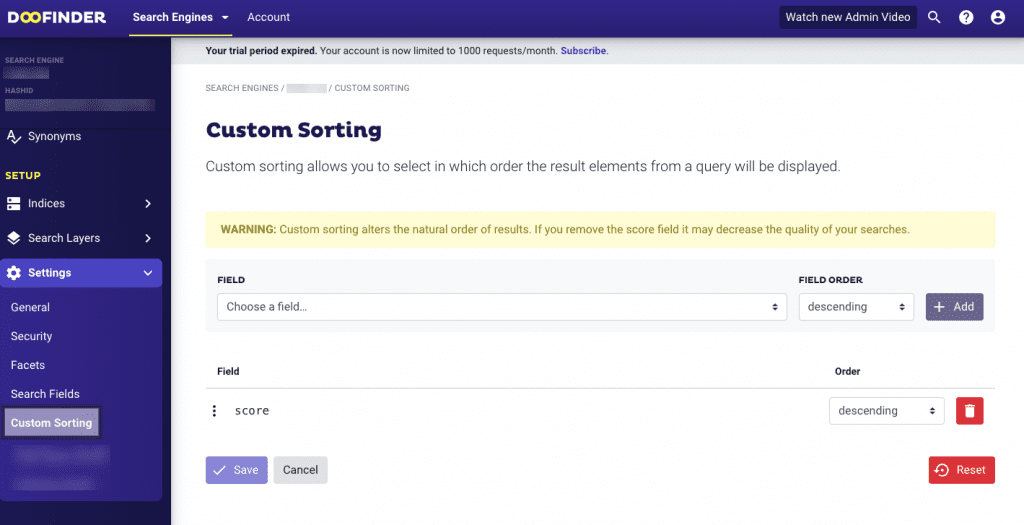
Regularly, the products in your online store are displayed based on an algorithm that gives them a certain score or score order. In some cases, however, two or more products may have the same score. One way to break this tie is by changing the product scores through boosting. If, nonetheless, you prefer maintaining the boosting scores as they are, using the Custom Sorting feature is an alternative way to break this tie.
Basically, Custom sorting helps you organise the order in which your online shop products will appear. Here, you can set the order of appearance of products with other different categories of products such as price, colour, size, etc. and decide what criteria you want to follow first, as perhaps you might not care about the score, but, say the stock you have available at that time.
We strongly recommend retaining the score as the top priority in the sorting criteria; otherwise, the quality of the results can reduce dramatically.
Before including Custom Sorting into your search engine, it is important to know how this interacts with the Custom Results that you may have already activated to modify natural search results.
Should you encounter any problems, please contact support@doofinder.com
Last Updated: July, 2021