To begin the installation process, ensure that you have the WooCommerce plugin already running on your website.
Installation
- In WooCommerce, navigate to the Plugins > Add New section and search for the Doofinder for WooCommerce plugin that is adaptable to your site.
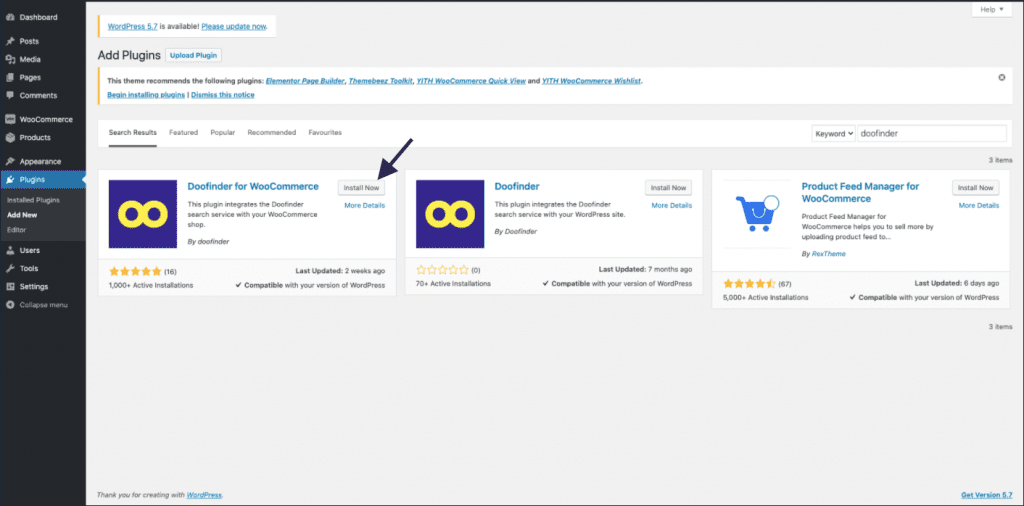
- Install and activate the Plugin.
- Then, head on to WooCommerce > Settings > Doofinder Search to proceed with a few other necessary configurations.

- Under the Doofinder Search tab, hit the Setup Wizard button to begin the configuration.

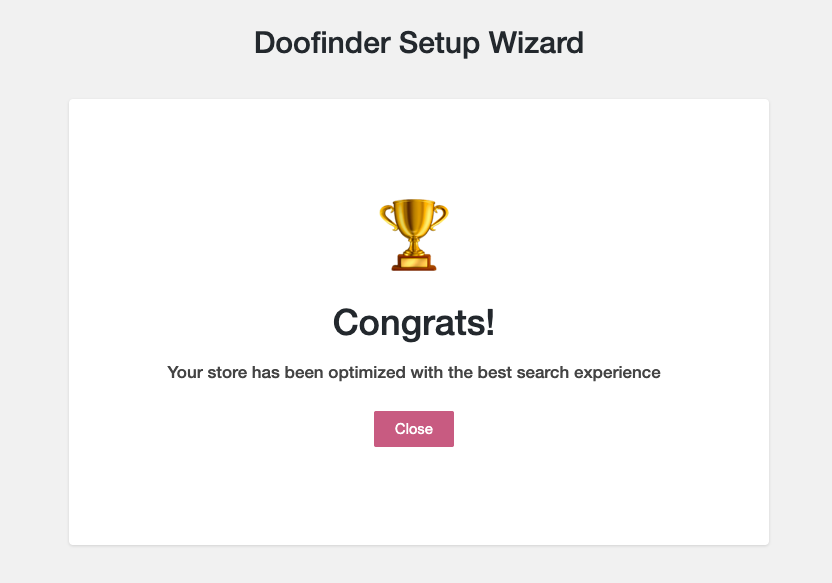
- WooCommerce will automatically connect to Doofinder where you will be prompted to Sign up or Login depending on whether you have a Doofinder account or not. Once the account is up, Doofinder will index your products and even create the layer that embeds Doofinder’s search.
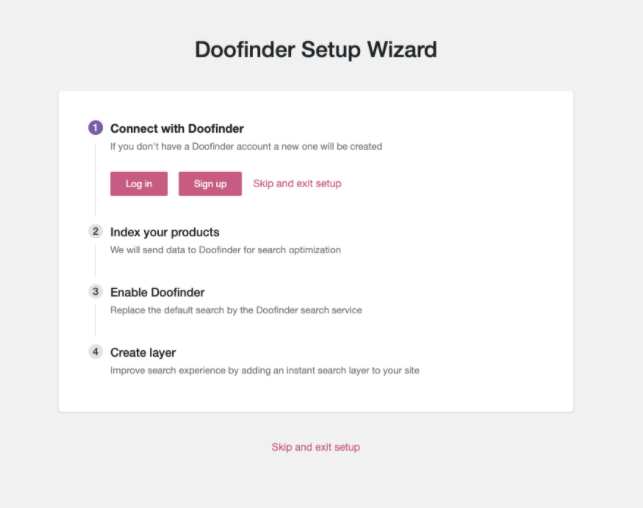
To install the extension you can go to the Plugins > Add New menu, search the extension in the WordPress Plugin Directory and choose Install Now. You will find the plugin in the official WordPress plugins repository.
- Upon completing these basic configurations, Doofinder should be installed and running on your site. From there, you can proceed with other manual configurations.
Further configuration
There are a few other manual configurations that you can also include on your site, such as the following:
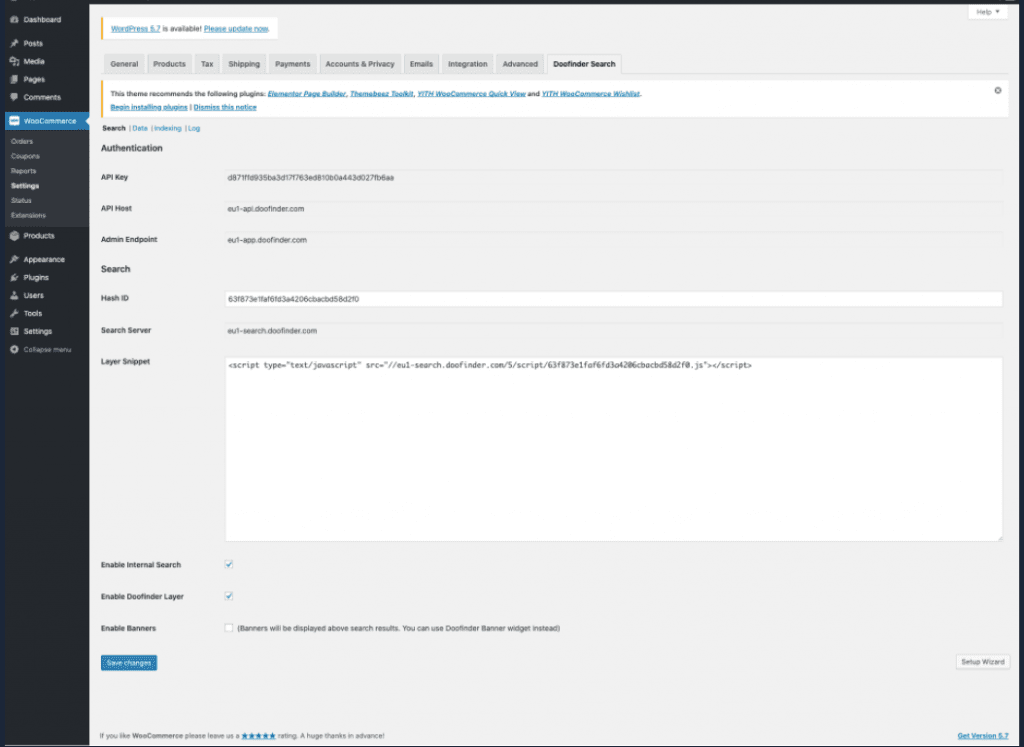
- While still under the Doofinder search tab, there are four other sub-tabs: Search Data, Indexing and Log. Under the Search, sub-tab confirm that the Internal Search and Doofinder Layer checkboxes are checked. Enable Banner is optional.
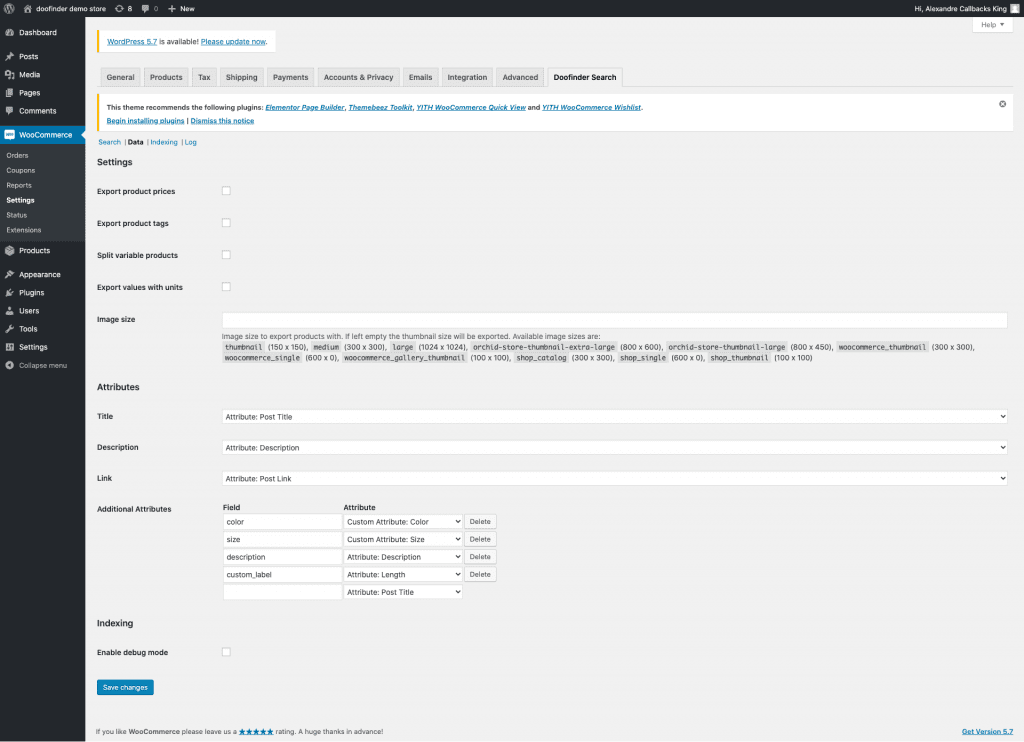
- Under the Doofinder Search > Data sub-tab, you may select whether to Export product prices, Export Product tags, Split variable products and so on. The data is indexed through the API.
📌 Note: By ticking the Split Variable Products checkbox, the plugin will index all the variations.
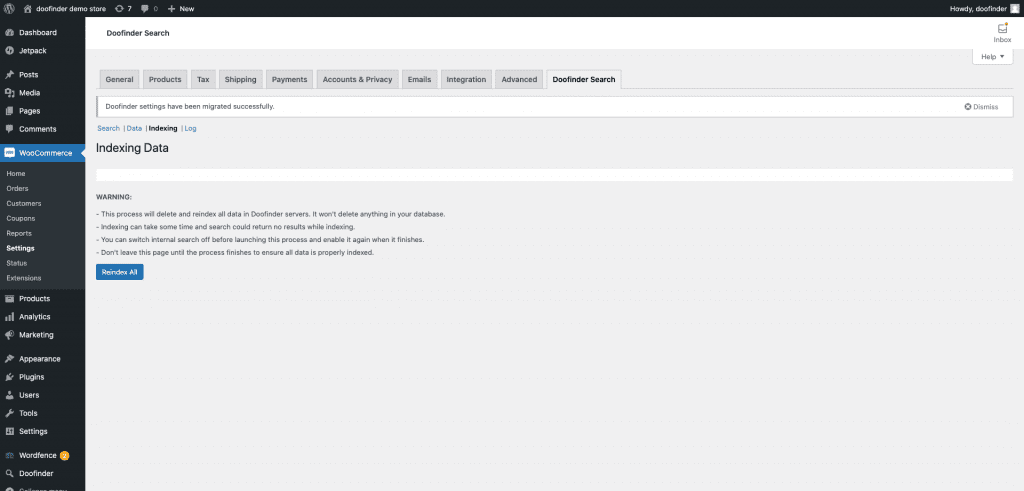
- Next, under Doofinder Search > Indexing sub-tab, you can push the catalogue re-indexing simply by pressing Reindex All. Alternatively, Doofinder will index in real-time.
⚠️ Warning: Make sure to read the warning note before reindexing.
Once completed, you can proceed with other Doofinder-specific configuration and customisation to your preference.
WooCommerce Legacy Setup
In some instances, you may encounter problems when attempting to complete the installation of Doofinder on your WooCommerce site. This could be due to a number of reasons such as using Firewalls like Wordfence which may block Doofinder’s IP such that you may encounter some errors such as:
- 403 (Forbidden): the client’s server blocks us
- 503 Service unavailable: client’s server is not responding
- 406 not acceptable; or
- Nothing happens …
The way around this is to select the Skip button and exit the setup. Then go to the Doofinder admin panel to make the configuration.
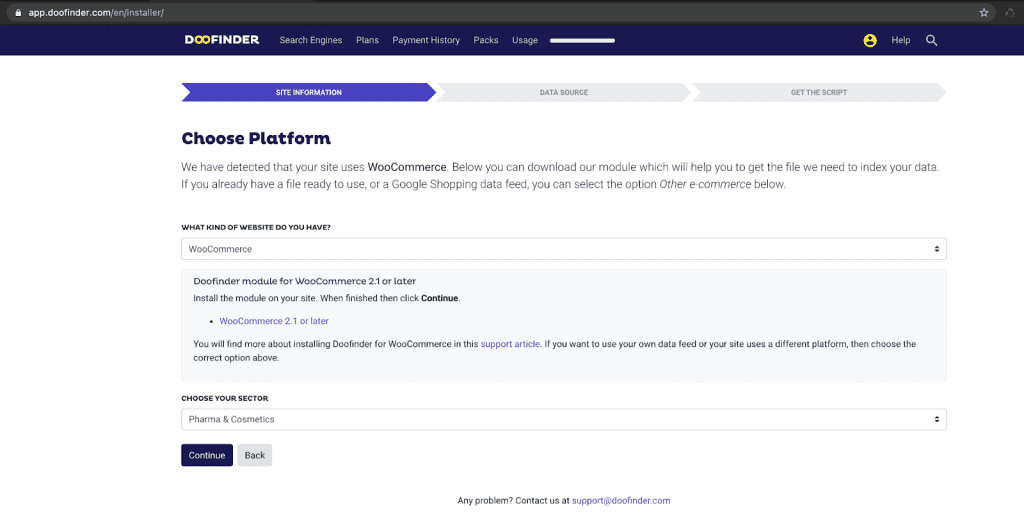
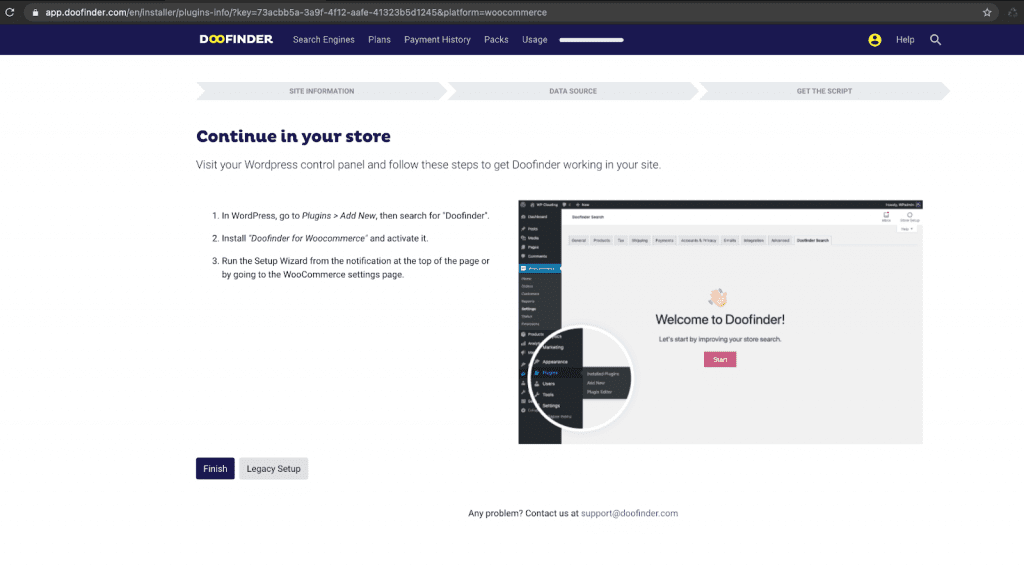
There, once you fill in the ‘Choose Platform’ fields and hit the continue button, you will be redirected to the ‘Continue in your store’ page where there are two buttons Finish and Legacy Setup.
Select the ‘Legacy Setup’ option.
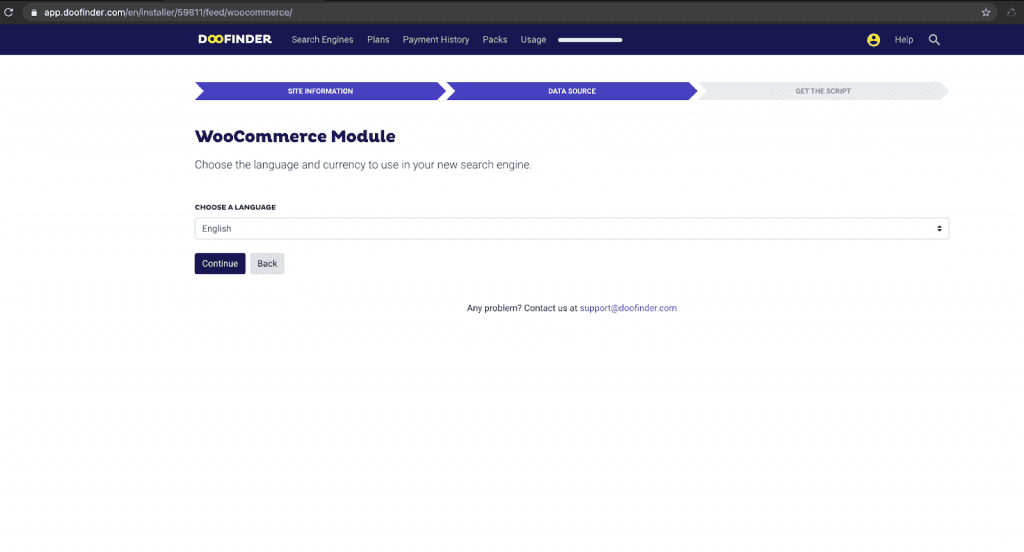
On the next page, choose the language of your WooCommerce website and continue.
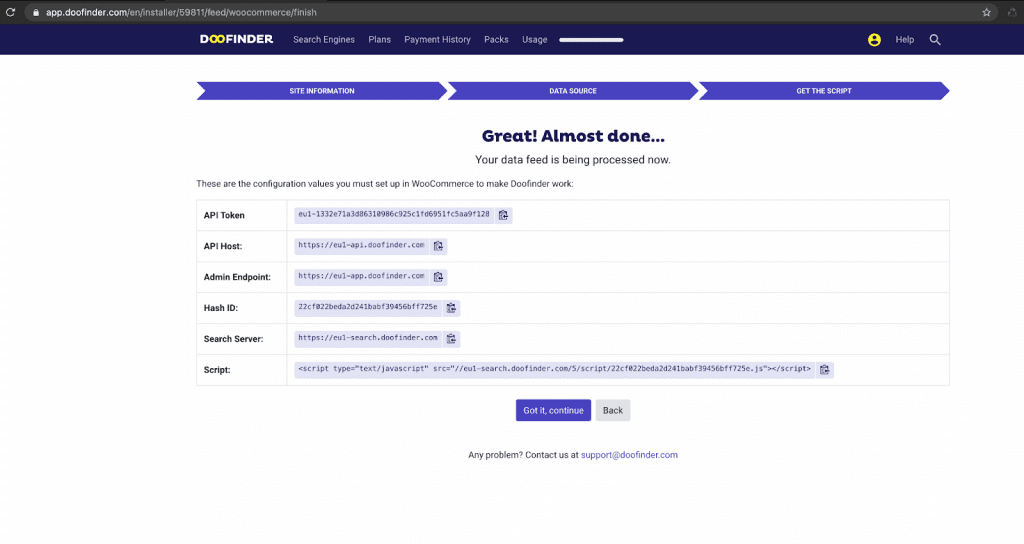
You will be redirected to a page notifying you that your data feed is being processed. On the same page, there is a list of configuration values that you need to set up in WooCommerce to make Doofinder work. These are:
- API Token
- API Host
- Admin Endpoint
- Hash ID
- Search Server
- Script
Copy and paste to your WooCommerce Site under WooCommerce > Settings > Doofinder Search > Search as illustrated in the following image:
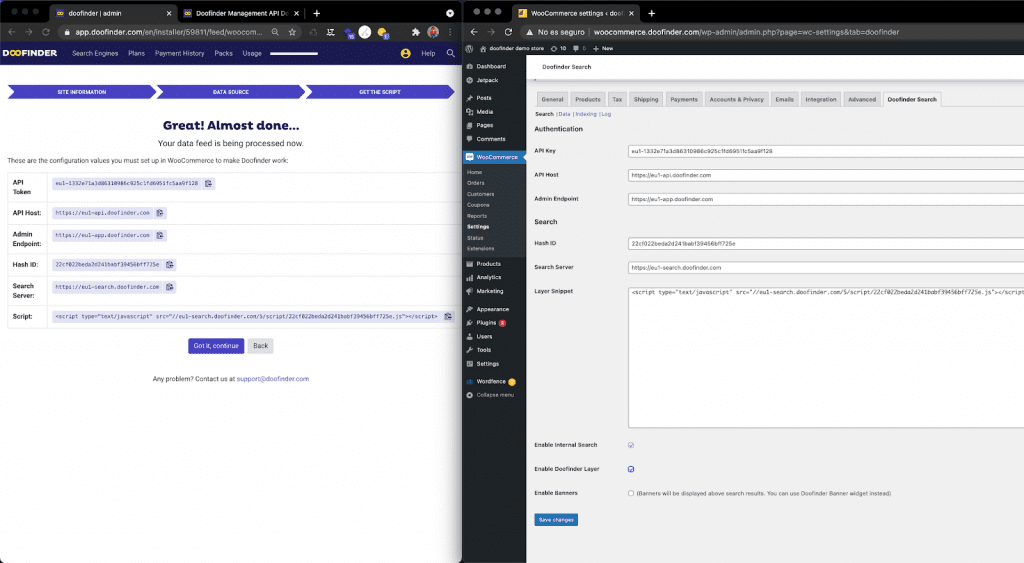
Note that of the three options at the bottom of the same page, that is:
- Enable Internal Search
- Enable Doofinder Layer
- Enable Banners;
The first two must be checked.
Once copied and pasted, return to the Doofinder admin panel and hit the ‘Got it, continue’button.
This completes the legacy setup as you will now be redirected to your Doofinder admin panel where you can proceed with further Doofinder Configurations and customisations.
Should you encounter any problems, please contact support@doofinder.com
Last Updated: June, 2021